SMS Provider Setup
NEMO needs to be synced with an SMS provider in order to use the SMS feature. Three options are available:
FrontlineSMS
You can turn your Android smartphone or tablet into a gateway using FrontlineSMS. For this you need to sign up for a FrontlineCloud account.
Synchronize FrontlineSMS with your Android device
Download FrontlineSync from the Play Store.
Open FrontlineSync app from your Android device.
Enter your FrontlineCloud email and password and press CONNECT.
Make sure Send messages using this Androis and Upload incoming messages from FrontlineSync are checked then press UPDATE.
Then press DONE! START USING FRONTLINESYNC.
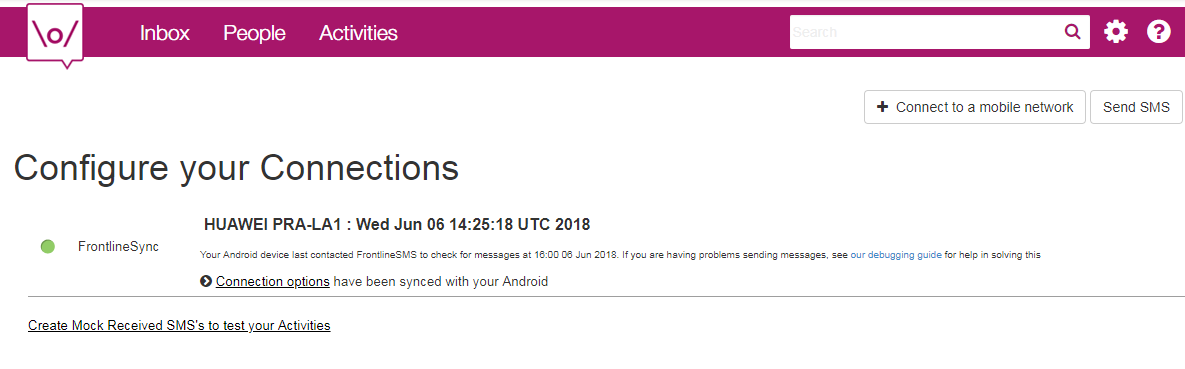
To test your setup:
Open your FrontlineCloud account.
Click settings on the top right then click Connections to mobile networks.
You should now be able to see the device you have previously set up.
Note
For more details check Frontline documentation.
Synchronize FrontlineSMS with NEMO
Now that you have synchronized your Android device with FrontlineCloud, you will need to synchronize FrontlineCloud with NEMO.
Set up a new activity
On FrontlineCloud click Activities.
Click Create an Activity.
Select Forward to URL.
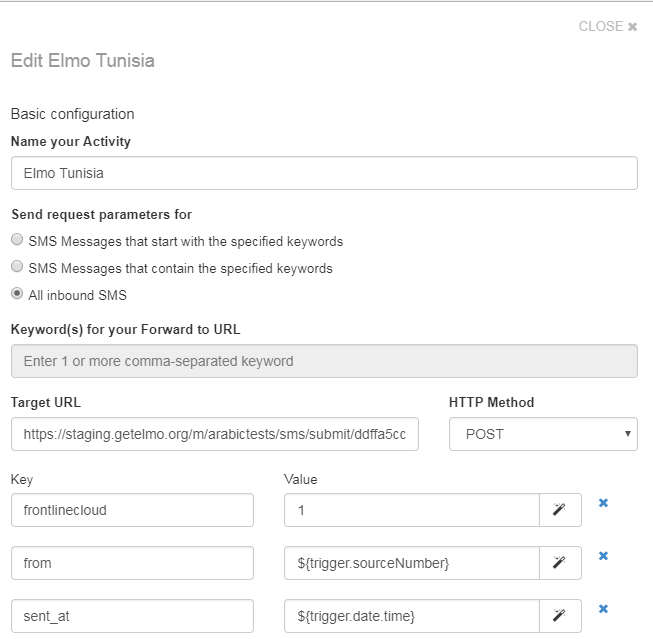
Type a name for your activity.
Select All inbound SMS.
To get the Target URL, get back to your NEMO mission, click Settings then in the Incoming SMS Token section click How do I use this? and copy the URL that shows up in the dialog.
Make sure HTTP Method is set to POST.
Now set the following key-value pairs:
Key |
Value |
|---|---|
from |
${trigger.sourceNumber} |
frontlinecloud |
1 |
sent_at |
${trigger.date.time} |
body |
${trigger.text} |
Click Save.
Generate an API Key
Click settings on the top right then click API web services and Integrations.
Click Connect a web service.
Select Connect an external web service to your workspace.
Enter a name for the web service.
A new row will appear on the screen with an API Key in the Details. We will need this API Key for the next step.
NEMO setup
Click Settings menu.
Add the SIM card number to the Incoming Number(s) field. If adding more than one number, separate the numbers with a comma.
Set Default Outgoing Provider to FrontlineCloud.
In FrontlineCloud Settings click Change API Key.
Paste the API Key that you previously generated in FrontlineCloud.
Twilio
If you are using Twilio as your SMS provider you need to set the following settings:
Twilio settings
Once you have created your Twilio account you will need to:
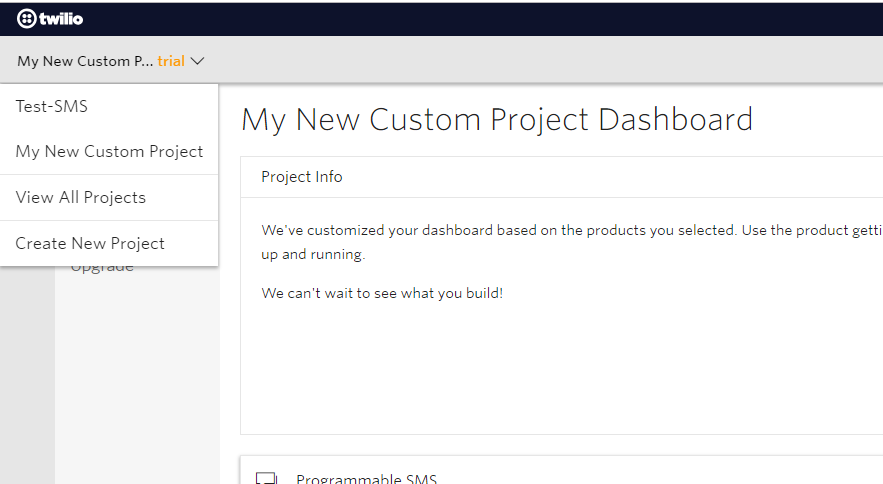
Create a new Twilio project
To create a new Twilio project:
Click on the top left menu .
Select Create New Project.
Select Products then choose Programmable SMS.
Click Continue.
Set up a Twilio phone number
Click on the left navigation to see the list of products and services.
Select Phone Numbers.
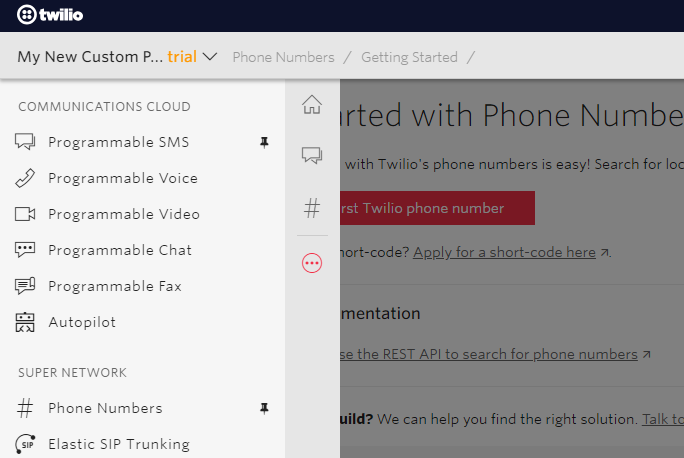
Once in the Phone Numbers menu, you have three options:
Get a free number from Twilio by going to Getting Started section.
Buy a Twilio Number by going to Buy a Number section.
Use your own Number by going to Use Your Number section.
Create a new Messaging service
You need to create a new messaging service in order to forward all incoming SMSes to NEMO, for this:
Click Programmable SMS on the left navigation.
Click SMS on the left menu.
Click to create a new messaging service.
Choose a name for the service and set the use case to Mixed.
Click Create.
Under Inbound Settings, check PROCESS INBOUND MESSAGES.
To get the REQUEST URL, get back to your NEMO mission, click Settings then in the Incoming SMS Token section click How do I use this? and copy the URL that shows up in the dialog.
Outbound Settings should be left blank.
At the end you should have a configuration similar to this one:
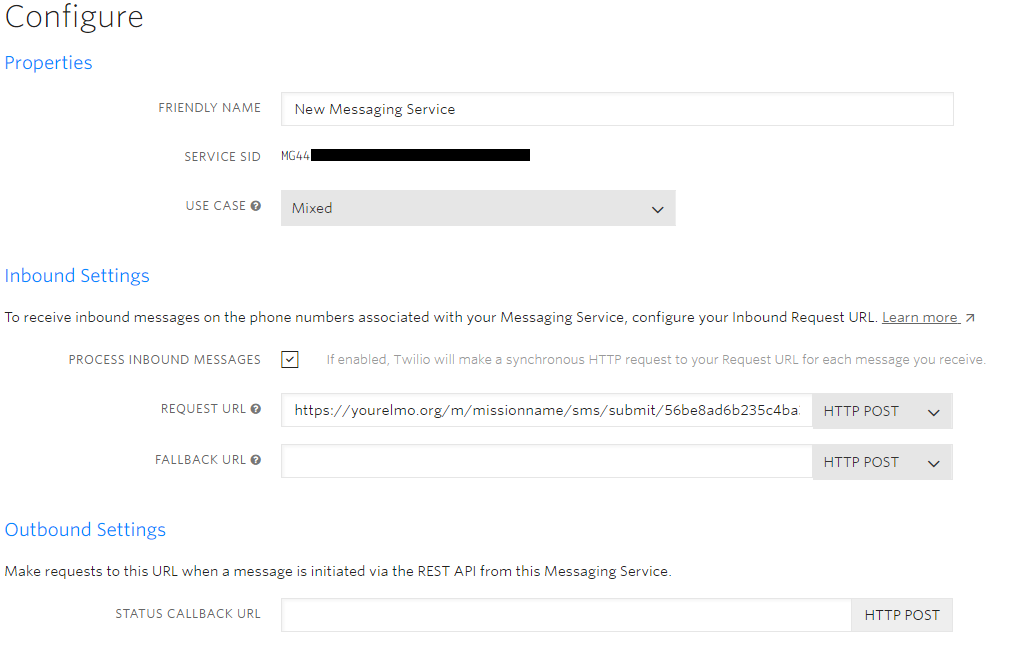
Click Save.
Now you need to add a number to this messaging service, for this, Click Numbers on the left menu.
Click to add a number.
NEMO setup for Twilio
In your NEMO mission:
Click Settings.
Add the phone number from which you will receive SMSes to Incoming Number(s) field. If adding more than one number, separate the numbers with a comma.
Make sure the Default Outgoing Provider: is set to Twilio.
Scroll down to Twilio Settings section, set the Outgoing Number which is the phone number registered with Twilio. SMS replies and Outgoing SMS broadcasts won’t work unless this number is owned by your Twilio account. This number must include the country code. Example: +25680344523.
Set the Account SID for your twilio account.
Click Change Auth Token to change the auth token for the Twilio account.
Click Save.
Generic SMS Adapter Settings
If you are using a provider other than Twilio and FrontlineSMS you will need to set up a Generic SMS Adapter.
Click Settings on your NEMO mission.
Make sure the Default Outgoing Provider: is set to none.
In Generic SMS Adapter Settings set a JSON formatted configuration string for the generic adapter. Example :
{
  "params": {
    "from": "num",
    "body": "msg"
  },
  "response": "<message>%{reply}</message>"
}